In our last blog, you learnt about exporting Word Template through Workflow. Now, let’s see how to create workflow for Report Templates. Follow the steps given below for the same.
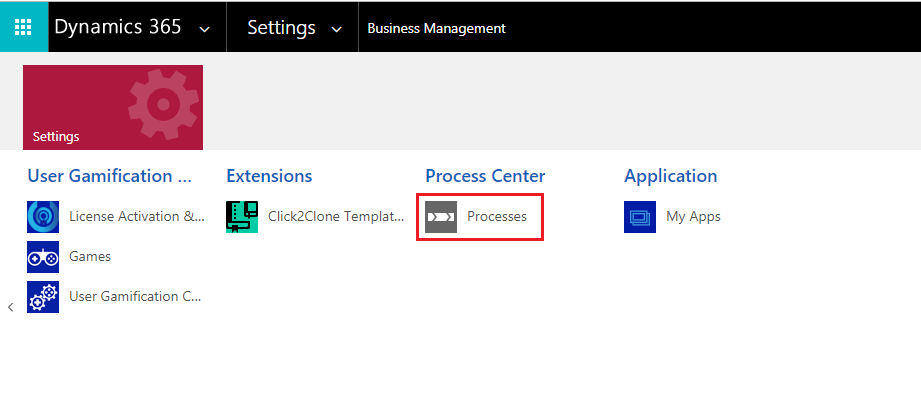
1) To create a workflow, navigate to Settings > Processes and click on ‘New’ to create a new workflow.
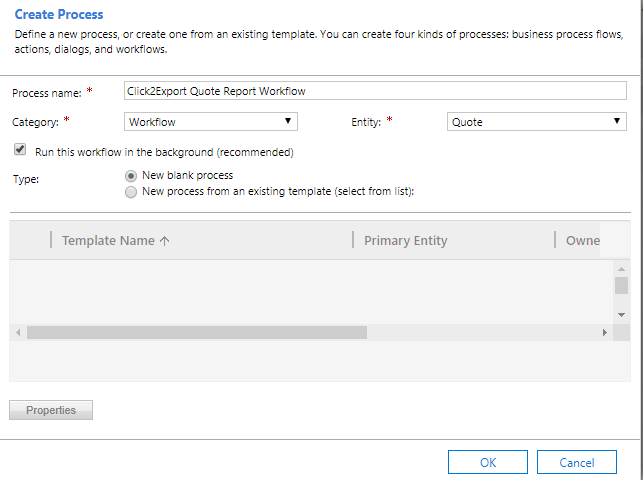
2) Enter the ‘Process Name’, select the ‘Category’ as ‘Workflow’and ‘Entity’ for which you want to create this workflow. Click on ‘OK’.
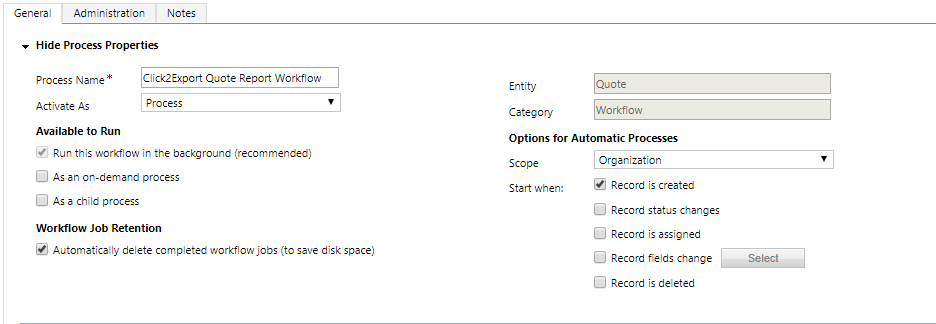
3) Here you can select whether you want the Workflow to be On Demand or trigger on a change of Options for Automatic Processes.
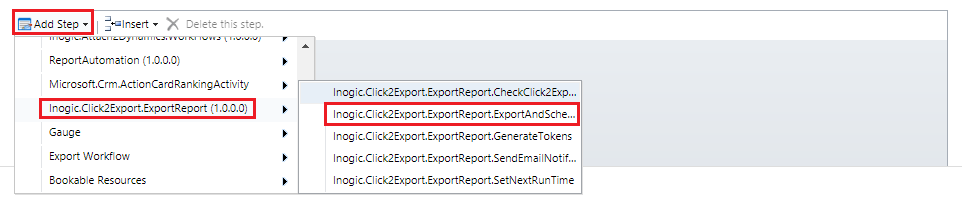
4) First user needs to click on ‘Add Step’. Click2Export ships with one workflow assembly namely ‘Inogic.Click2Export.ExportReport.ExportAndScheduleReports’. This step is required to call the workflow for performing the selected action.
5) Now click on ‘Set Properties’ for Click2Export.ExportReport.ExportAndScheduleReports.

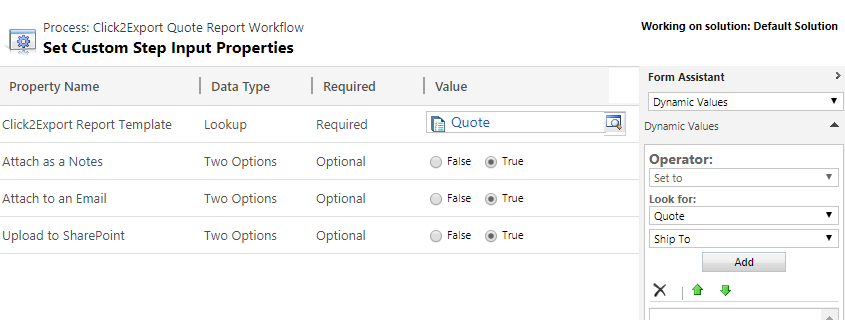
6) Now on the ‘Click2Export Report Template select required ‘Report Template’ from the drop down options.
7) User can select the required action i.e. Attach as a Note, Attach to an Email or Upload to SharePoint as True for performing the workflow accordingly and click on ‘Save and Close’.
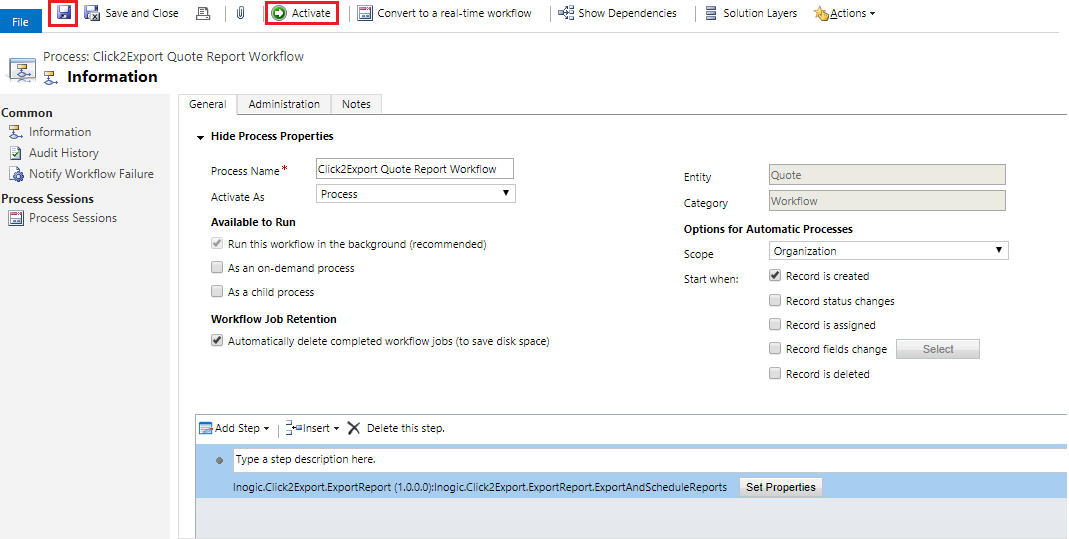
8) Now ’Save’ and then ‘Activate’ the process.
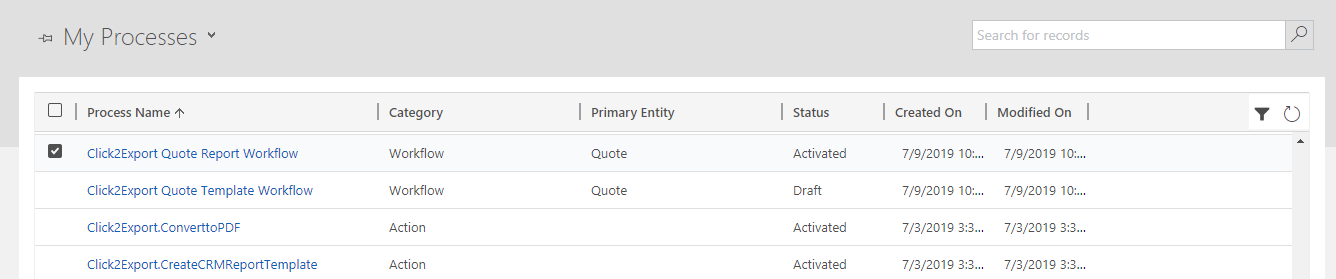
9) You can now see the workflow in ‘My Processes’.
Once the workflow is configured and triggered the process will start. You can create different workflows for different entities as per your requirement and export reports for further study.
Thus, you have seen the process how to automate the process of expoting Report Templates.
In case you have a query mail us at crm@inogic.com.
Go back to Click2Export InfoCentre homepage.