This feature of User Adoption Monitor helps you to keep track of records that each user worked on. Once Check-in & Check-out configuration for a particular entity is completed, ‘Check-in’ button will appear on the ribbon of every record in that particular entity. The user has to click on it before resuming any task related to that particular record. Once the user clicks on ‘Check-in’ it automatically changes and ‘Check-out’ button will appear in its place. After the task is completed the user has to click on ‘Check-out’ button before leaving that record. In this way you can easily track the amount of time spent by each user on a particular Entity record.
Note: User Adoption Monitor Administrator or User Adoption Monitor User role is necessary to access Check-in/Check-out button.
Steps to enable Check-in & Check-out Configuration
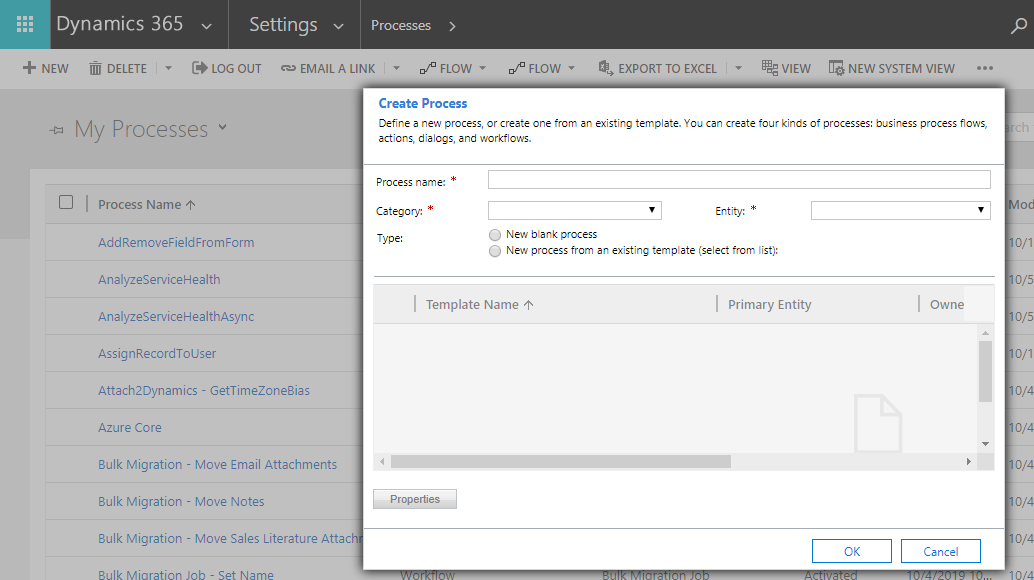
1) First, you have to create action for the required entity. For each entity, you have to create separate actions. Go to Advanced Settings -> Settings -> Click on New.
2) Next, fill the required fields as follows:
-
- Process name: Name the process, for e.g. UAM-Case-CheckInCheckOut
- Category: Select ‘Action’
- Entity: Select the required entity. Here ‘Case’ entity is selected
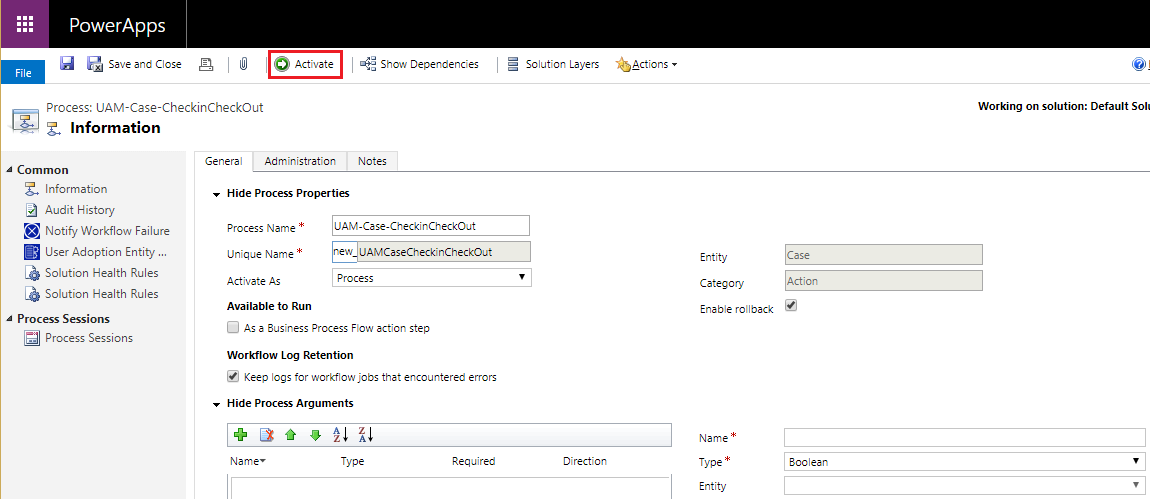
Once the details are filled, click on Ok. Then ‘Activate’ the action as shown below:
3) Now, go to Entity Configurations (User Adoption Monitor group). Click on New.
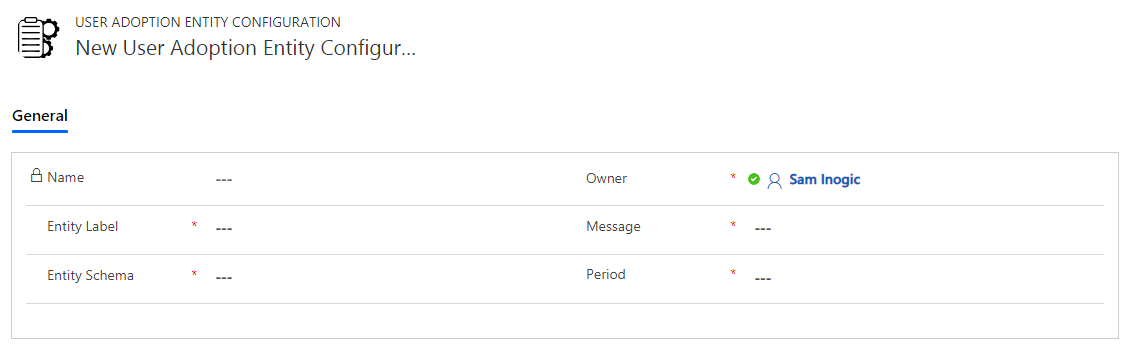
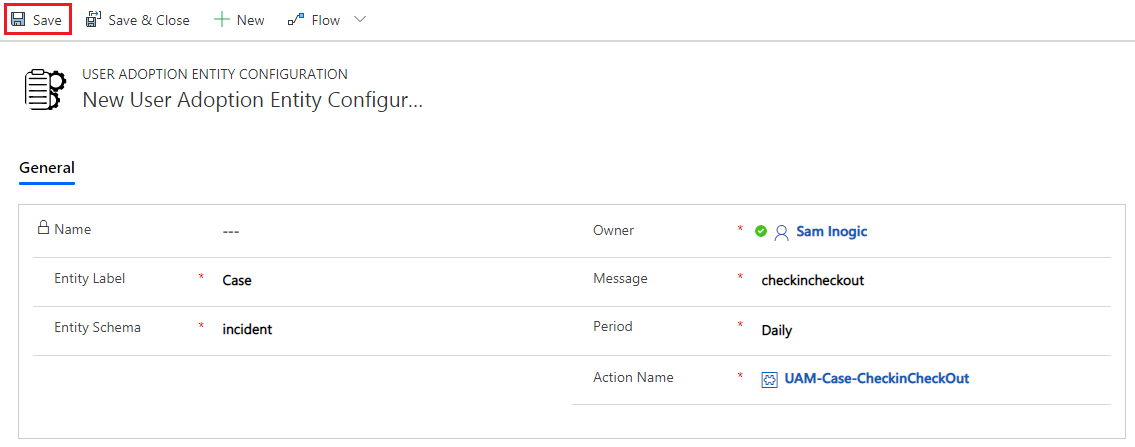
4) Fill the required fields as follows:
-
- Entity Label: Give name of required entity. For e.g. Case
- Message: checkincheckout (After populating this field, you will get another lookup field – Action Name)
- Entity Schema: case
- Period: Select period i.e. Daily, Weekly or Monthly
- Action Name: Select the action created, for e.g. UAM-Case-CheckInCheckOut
Click on Save.
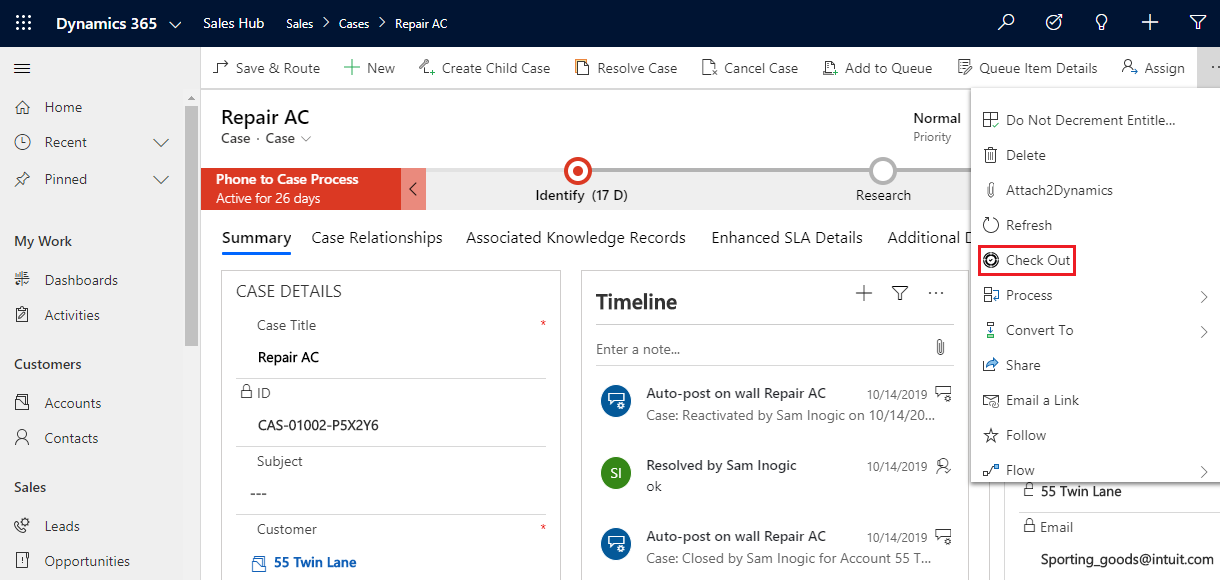
5) Now go to a particular record in Case entity. Here, you will see the Check-in button. Click on the same before doing any task on that particular record.

6) Once the task is completed, click on Check-out button. Both Check-in & Check-out button are interchangeable.
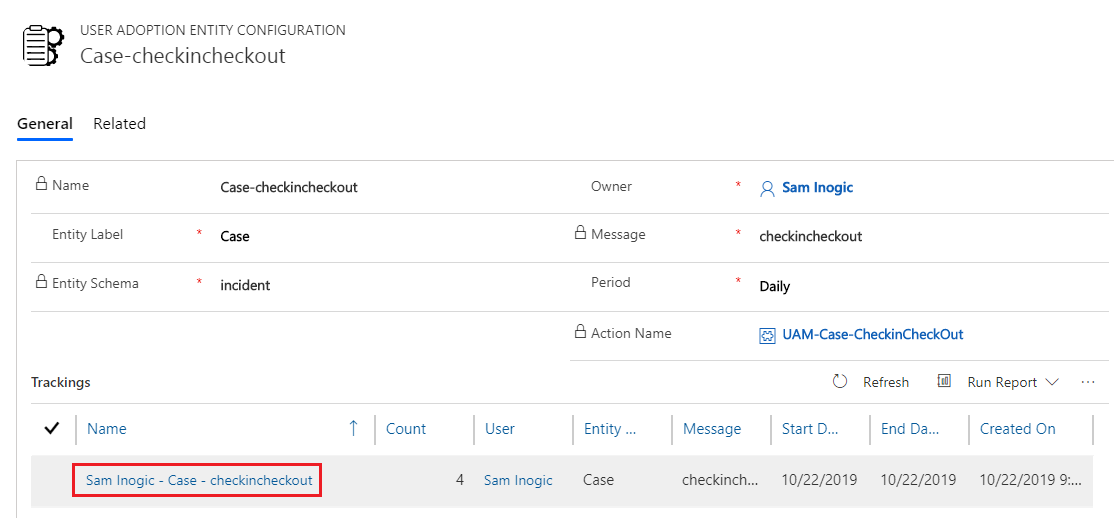
7) Now go to Entity Configurations -> Case-checkincheckout. Here, you can view associate Tracking records per user. Click on respective user for more details.
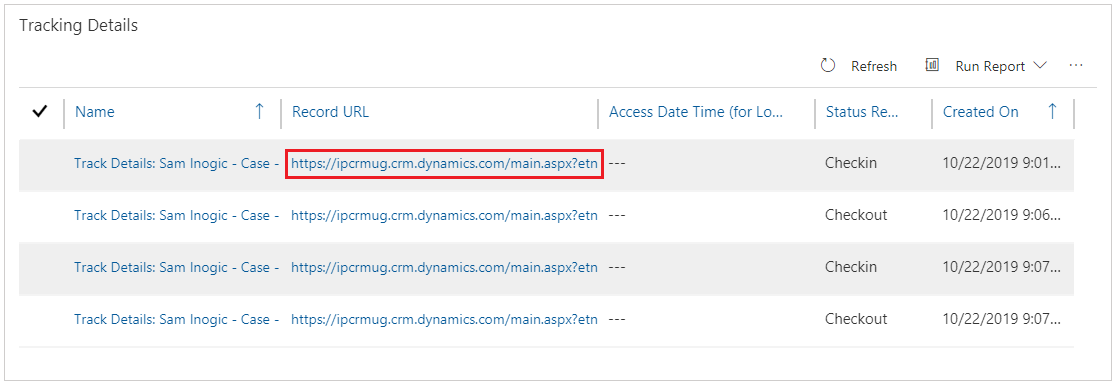
8) Then click on record URL and you will be directed to the record that the user worked on.
In this way you can easily keep track of Check-in & Check-out details of Dynamics 365 CRM users in your organization.
For more details, just visit our Website or Microsoft AppSource.
Or you can mail us at crm@inogic.com for queries and personal demo.
Go back to User Adoption Monitor InfoCentre homepage.