Introduction
When it comes to Customer Service, the SLA plays a very crucial role to track performance against Key Performance Indicators (KPIs). With the Dynamics 365 CRM web client interface, we used to configure KPIs with traditional workflow actions when SLA is violated like send an email to agents if SLA is failed or warned. As you can see in the screenshot below that on the failure of SLA Item, we have available actions in the traditional way.

But these traditional workflow actions are limited to Dynamics 365 CRM since it doesn’t have any provision to call/execute external apps which means we cannot connect or do any operations outside Dynamics 365 CRM apps. Suppose, you wanted to post a message in MS Teams, you cannot do so with traditional workflow actions but with Power Automate you can do this. Here, I have given just one example with MS Teams but we can also connect/call various applications using Power Automate like Mailchimp.
Before moving ahead I would like to inform you that this feature is only available in Unified Interface where you can see the option to configure Power Automate when SLA is violated and this feature is introduced in 2020 wave 1.
Below steps you can use to configure SLA:
Step 1:
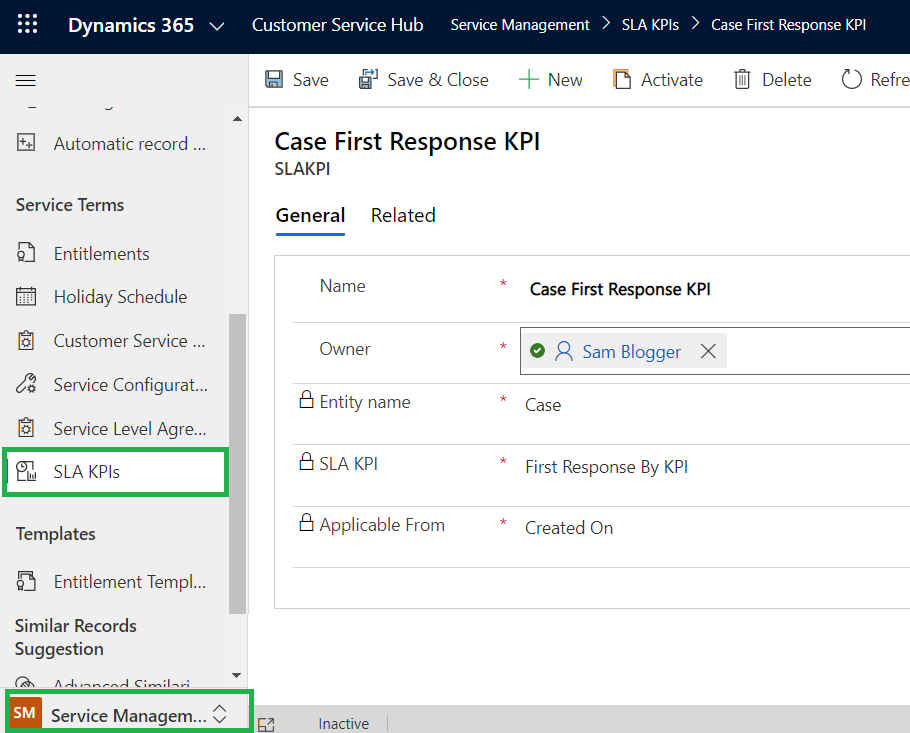
Open the Customer Service hub app and change the area to Service Management. Create SLA KPI for required the entity and activate it using the Activate button. In the below screenshot, you can see that I have selected the Case entity with ‘First Response By KPI’ KPI.
Step 2:
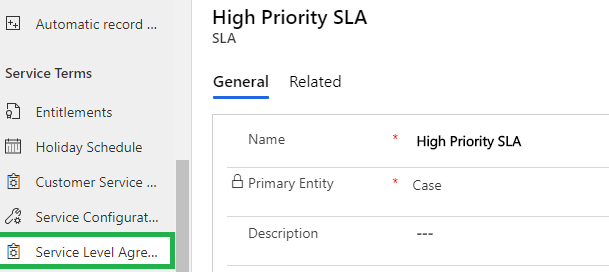
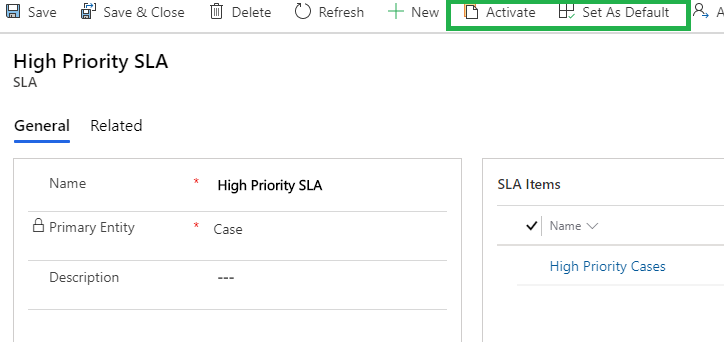
Now, create SLA for the entity.
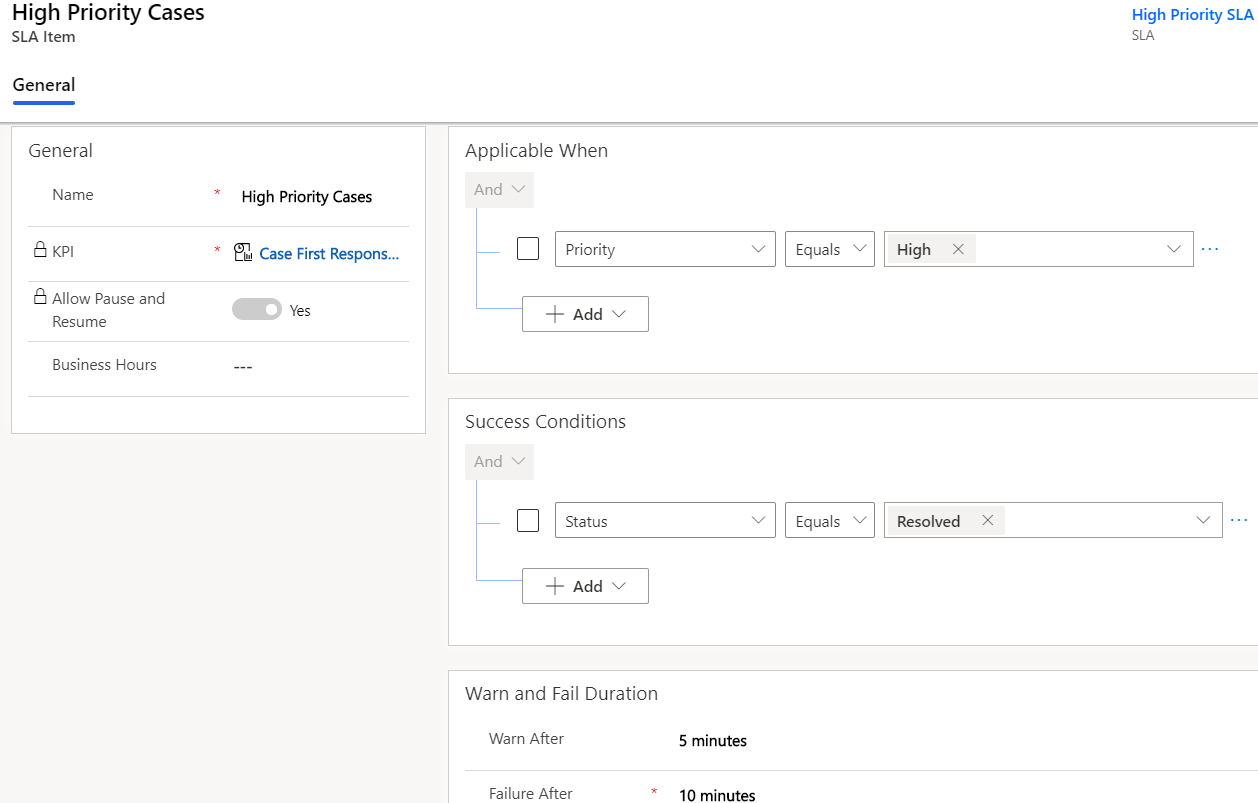
Once you create it then you can create SLA Items. So use the ‘+New SLA Item’ button on the sub-grid of the SLA Item on the same SLA. Here, you can define SLA Applicable, Warning, Success criteria and call Power Automate actions.
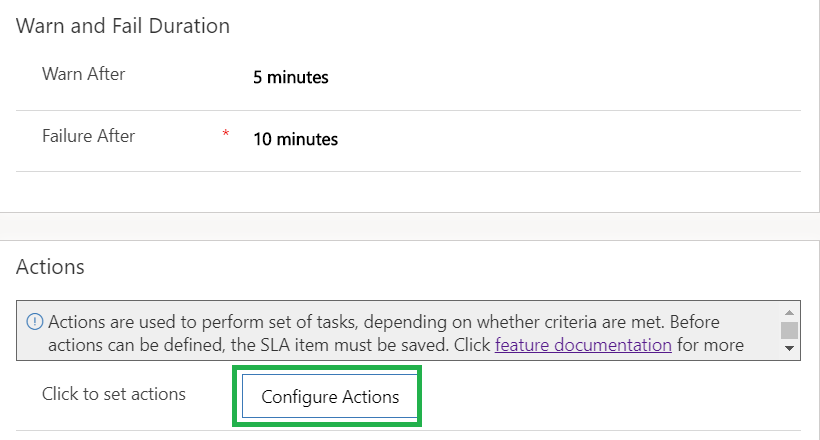
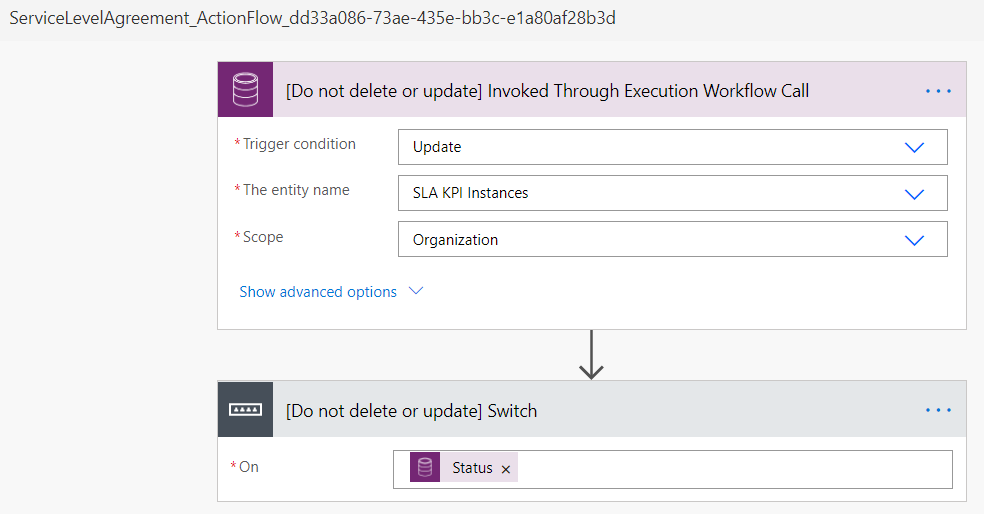
At the bottom of the page, you can see the option to configure Power Automate using the ‘Configure Actions’ button. Before that, save SLA item so that you can see the ‘Configure Actions’ button. After you click the button, it will navigate to the Power Automate site and by default triggering event and switch conditions defined. We can use these steps. Here, do not delete/update these already defined steps as we just need to add our step/action in the required place.
As shown below, you can see the triggering event that triggers whenever SLA KPI is violated like warned, failed, succeeded. So you need to identify which event has been occurred and whether it is warned, succeeded or failed. To identify the event, we have an attribute called Status. So, in the below screenshot you will see switch condition which has already been added by default with ‘Status’ attribute:
This status attribute gives integer values. Below table will help you to identify each status:

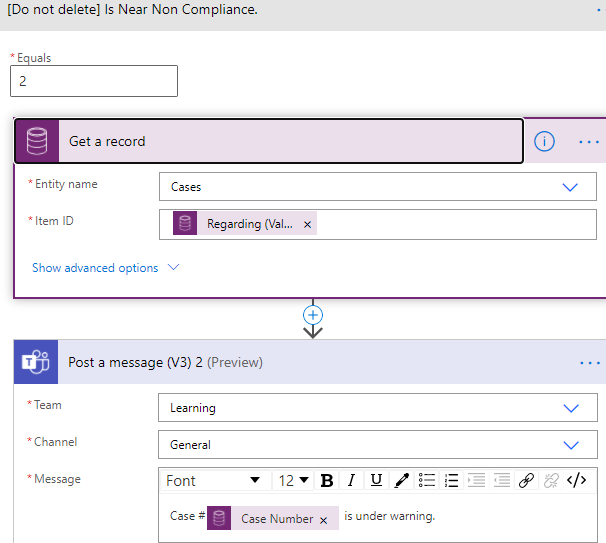
You can see in the below screenshot that 3 conditions have already been added by default so here we just need to add our actions inside ‘Switch’ condition wherever it satisfies.

I have added two steps, one is retrieving ‘Case Number’ and another one is Connector of MS Teams (Post Action) to post a message in MS Teams. So, here whenever SLA is failed/warned/succeeded, a message will be posted in the MS Teams Channel with ‘Case Number’ and the agents will get to know particular Case’s SLA has been violated.
Note: Currently, MS Teams action (Post a Message V3) is in preview mode. I just showed how to post a message on Team’s Channel if SLA is violated. You can do something else as per your requirement.
Once the configuration is completed, save it. Now, come back to SLA Items and save them. Then finally save the SLA and activate it. Also, set default SLA if required.
Now, as per above configuration steps, if SLA gets failed/warned/succeded, a message will be posted in the MS Teams Channel as shown in the below screenshot:

How to move Configured SLA using Power Automate from one environment to another?
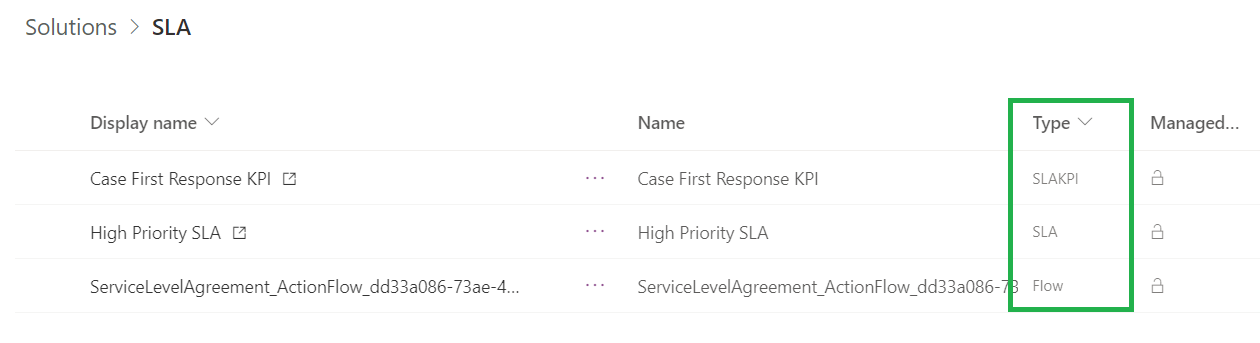
It is a simple process that we can do with CRM solutions concepts. So, create a new solution in environment and add the components i.e. SLA, SLA KPI and Power Automate. Export the solution and import it into desired environment.
In the screenshot below, you can see that I have added SLA, SLA KPI and Power Automate in a Solution.
Conclusion
Thus, as illustrated above, with the help of Power Automate you can configure actions in SLA.
Hi there,
Once the solution get exported, it automatically add the target entity (e.g. Case) and all of its components (fields, relationships. views, forms, business rules…) into the solution. This is insane if you want to deploy from development environment to production where many other solution is in the pipeline and you do not want to deploy unwanted components to production.
Do you have any way to remove/exclude the target entity from the solution?
Just re-checked, while exporting SLA it won’t add target entity(eg. case) so we don’t think it would be a problem. If we add only SLA and FLOW then we can export solution without target entity.
You can see below screenshot below components to be required to export SLA: