Introduction:
PCF (PowerApps Component Framework) are used to create Field type and Data-set type code components and provide an enhanced user experience for the users to view and work with data in forms, views, and dashboards.
In this blog, you will be given information about how to add Data-set control and where you can see Data-set control.
You can add Data-set control for below components in Dynamics 365 CRM:
- Dashboard
- Entity
- Entity View
- Sub-Grid
1) To add Data-set control on Dashboard follow the steps given below:
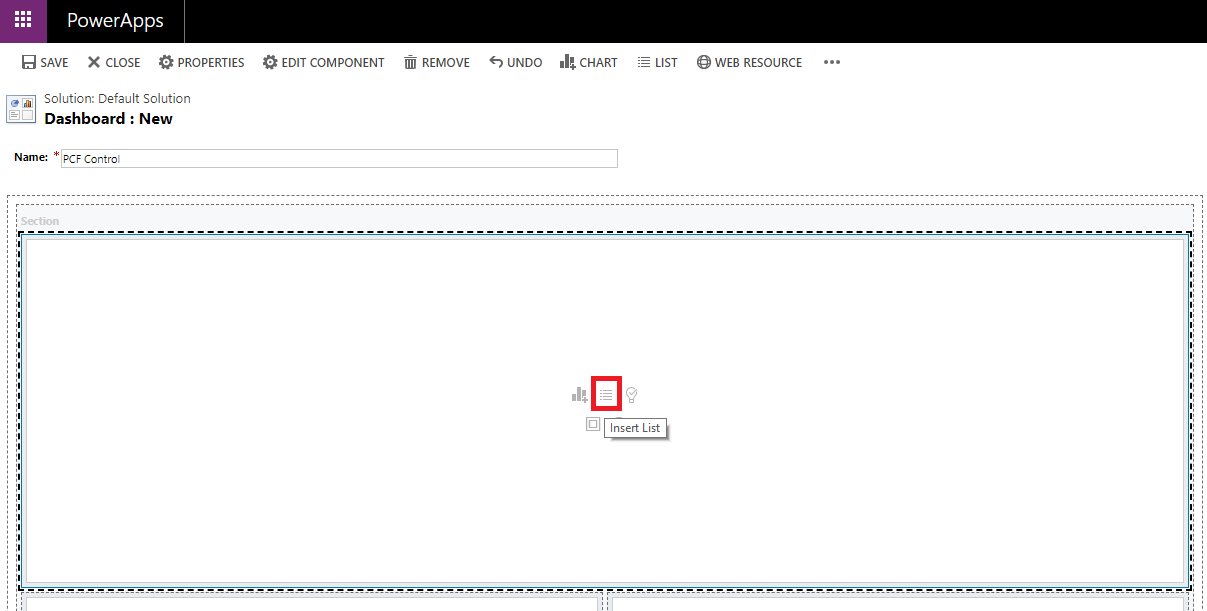
- Create new Dashboard. Click on ‘Insert List’.
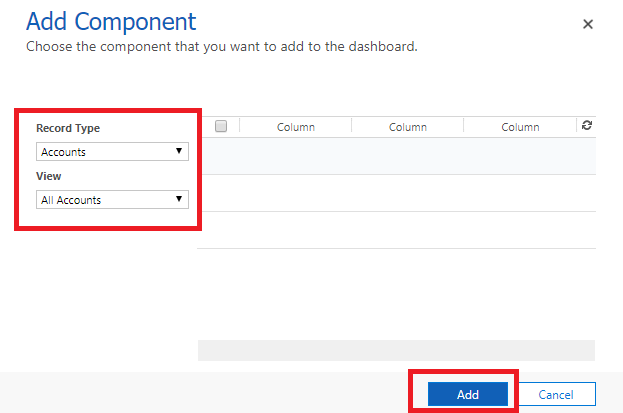
- Select Entity as ‘Record Type’ and ‘View’, for e.g. ‘Accounts’ and ‘All Accounts’ and click on ‘Add’.
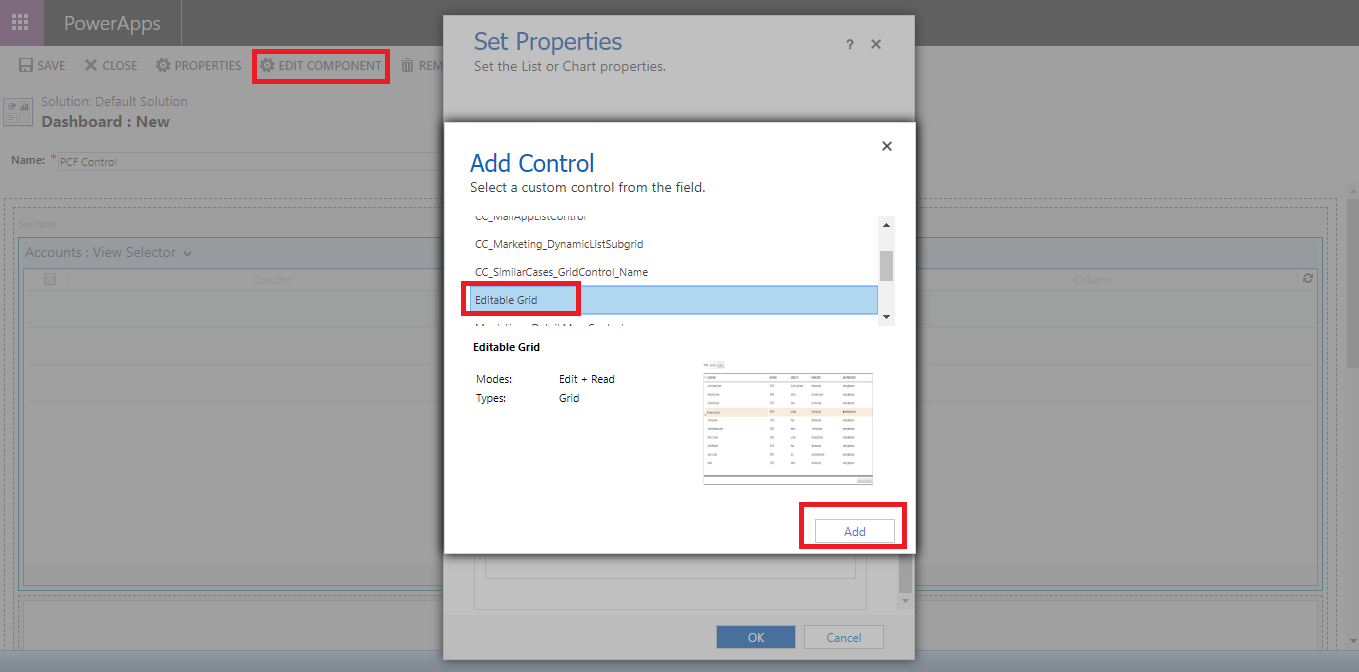
- List is now added in Dashboard. Next, click on ‘Edit Component’ to open Set Properties window. In that, click on ‘Controls’ > ‘Add Control’ (List of Data-set control is displayed) > Select the respective Data-set Control that you want to add > Click on ‘Add’. For example, here we have selected ‘Editable Grid Control’.
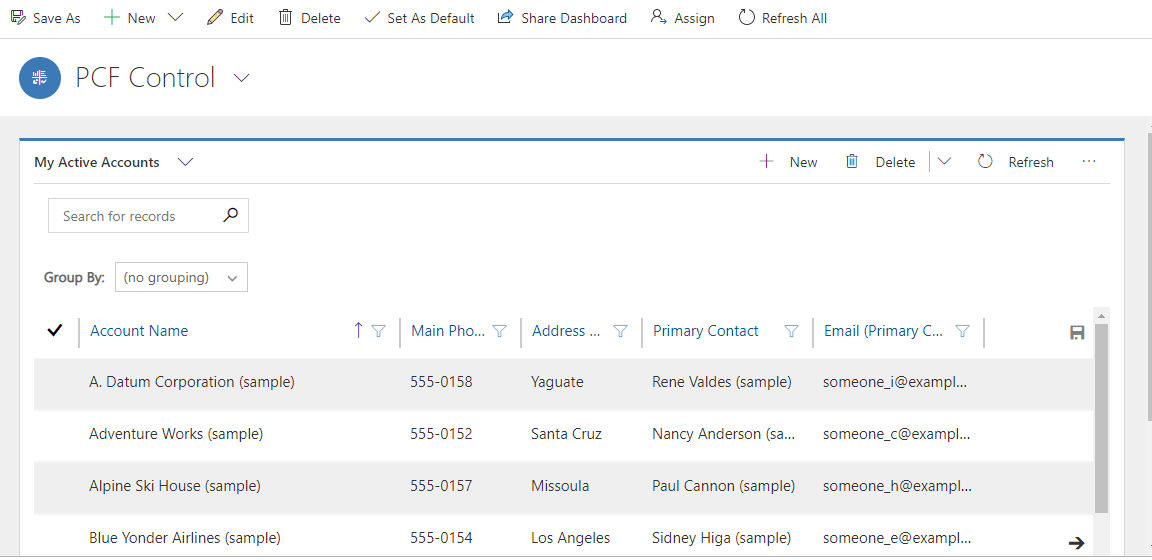
- You can see Editable Control on Dashboard as shown below:
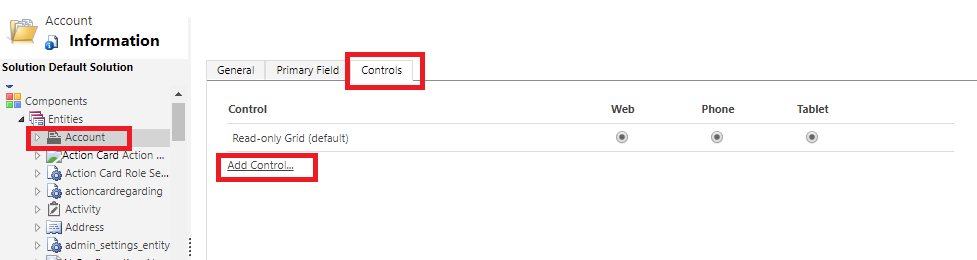
2) To Add Data-set Control on Entity follow the steps given below:
- Go to Settings > Customizations > Customize the System> Entities> Click on any Entity, for e.g. ‘Account’. In that, click on ‘Controls’ > ‘Add Control’ (List of Data-set control is displayed) > Select the respective Data-set Control that you want to add > Click on ‘Add’. For example, here we have selected Editable Grid Control. Follow the same process to add another Data-set Control.
- Next, choose Web, Phone or Tablet where you want control to be loaded by default. For example, here we have selected ‘Web’ for Editable Grid control. Click on ‘Save’ and then ‘Publish’.

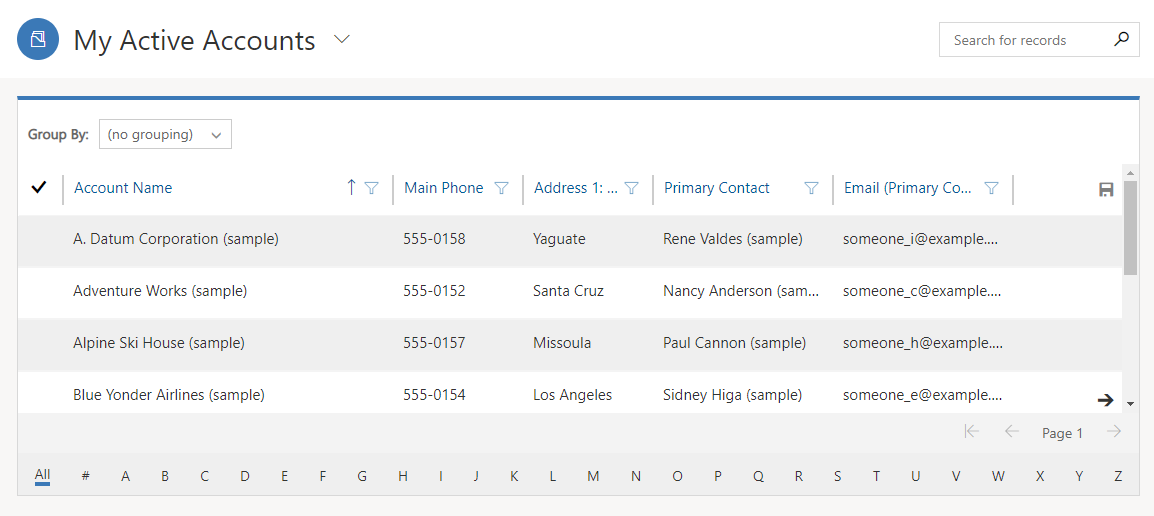
- You can see control as shown below:
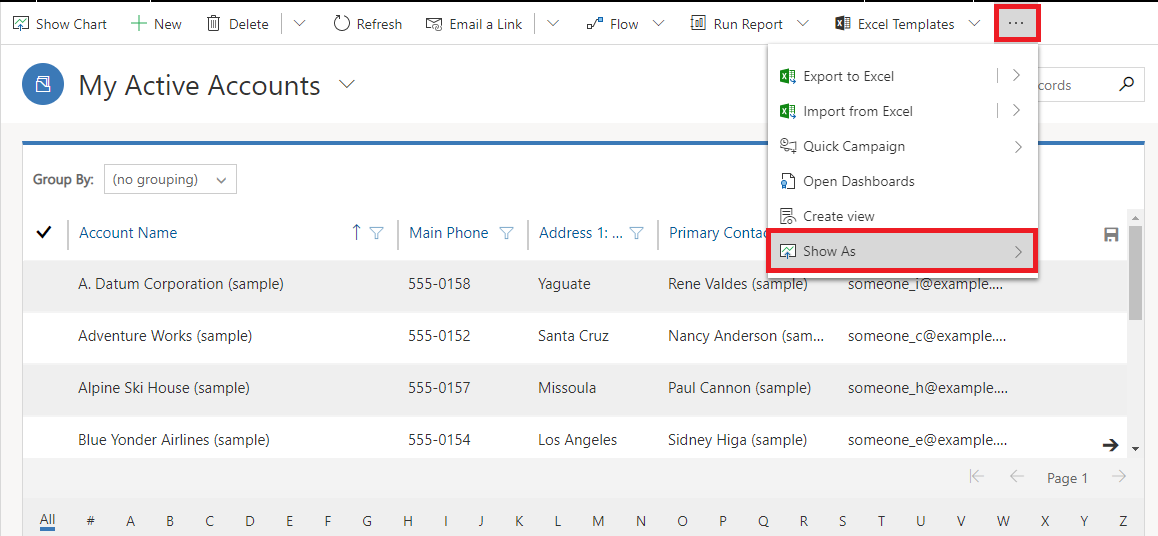
- To see Account Records in different Data-set control, Click on the three dots > Show As > select another Data-set Control.
Note: Added Data-set Control will be available for all views.
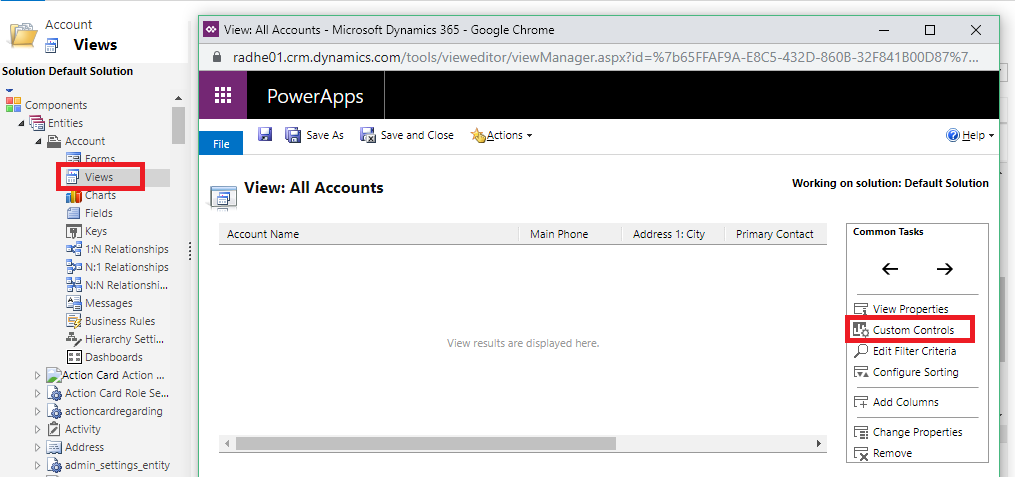
3) To Add Data-set Control on Entity View follow the steps given below:
- Go to Settings > Customizations > Customize the System> Entities > Click on any Entity, for e.g. ‘Account’ > Views > Click on any view, for e.g. ‘All Account’. In that, click on ‘Custom Controls’ > ‘Add Control’ (List of Data-set control is displayed) > Select the respective Data-set Control that you want to add > Click on ‘Add’.
Note: Added Data-set control will be available for this view only and not for all other views.
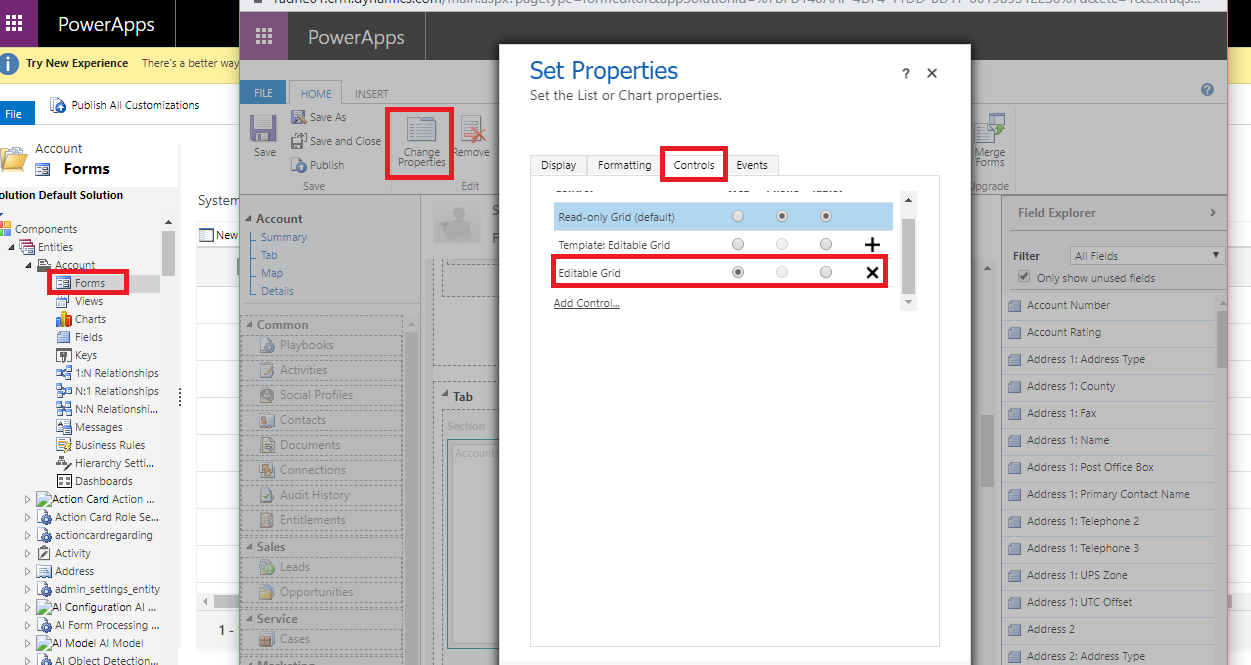
4) To Add Data-set Control on Sub-Grid follow the steps given below:
- Go to Settings > Customizations > Customize the System > Entities > Click on any Entity, for e.g. ‘Account’ > Forms > Click on any Form, for e.g. ‘Account’. Click on Sub-Grid > select ‘Change Properties’. In that, click on ‘Controls’ tab > ‘Add Control’ (List of Data-set control is displayed) > Select the respective Data-set Control that you want to add > Click on ‘Add’.
Conclusion:
As illustrated above, you can easily add PCF Data-set control in Dynamics 365 CRM.
Cut short 90% of your manual work and repetitive data entry!
Get 1 Click apps and say goodbye to all repetitive data entry in CRM –
Click2Clone – Clone/Copy Dynamics 365 CRM records in 1 Click
Click2Export – Export Dynamics 365 CRM Report/CRM Views/Word/Excel template in 1 Click
Click2Undo – Undo & Restore Dynamics 365 CRM data in 1 Click