
Introduction:
Azure function is a serverless architecture where your code is hosted in the cloud and you do not need any infrastructure to host this. Traditionally extending business logic for Dynamics 365 Customer Engagement (D365 CE) included creating plugin and workflow assemblies which would be deployed to CRM using Plugin registration tool. The assembly could be either stored in the database, the preferred way or disk (on-prem only). The assembly had to be registered in sandbox mode that resulted in limited actions that could be performed through these assemblies.
For a few versions now, we were allowed to register Azure aware plugins and workflows. With v9.x, Webhooks are now supported. Webhooks are in layman terms – Event-driven programming – When an action occurs, it would raise/notify an event and it would push the data to all the subscribers of the event. Plugins and Workflow architecture were based on notifications where we would register/subscribe to messages on entities and when those actions occurred it would execute the business logic in our assemblies.
In this series, we would walk through an example of creating an Azure function and call the same through the following:
- An example of directly calling an Azure function from traditional workflows.
- Register as a WebHook and invoke it from a workflow.
- Register as a WebHook and register steps for messages that you would like the custom logic to be executed for.
Creating an Azure function:
Let us begin with creating the dev environment for Azure function to enable local execution and debugging.
You could use both Visual Studio as well as VS Code for developing Azure function. You could actually just write it all on a Notepad 🙂 Azure functions support various scripting languages, however, in this example, we will use C#.
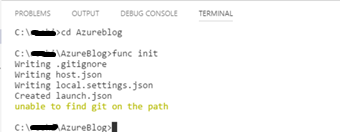
Let us begin with creating a folder (Azure) which will be the root folder and will hold all the functions we create. In order to develop and test Azure Function locally, you must have installed “Azure Functions Core Tools. Use the “npm install -g azure-functions-core-tools” command to install it.
Next in VS Code – command prompt type in the following command to initialize the environment, “func init”
Now we shall go ahead and create our first function.
C:\user\AzureBlog>func new –language C# –template “Http Trigger” –name D365HttpTrigger
This will go ahead and create the following structure in the Azure blog folder:
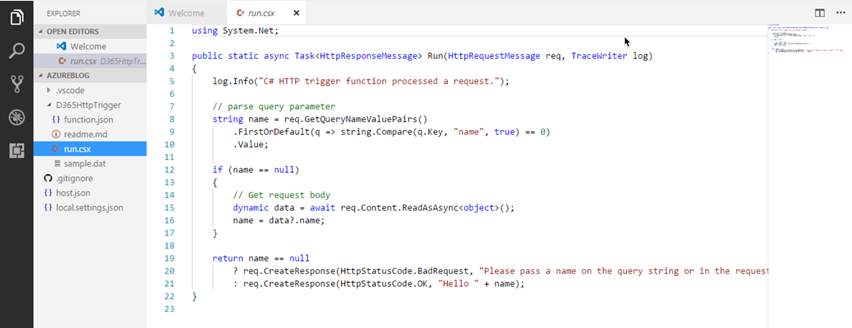
The scaffolding is ready with the function code ready for execution. Your function is ready to be executed.
This function could be executed through either an HTTP Get or HTTP POST request.
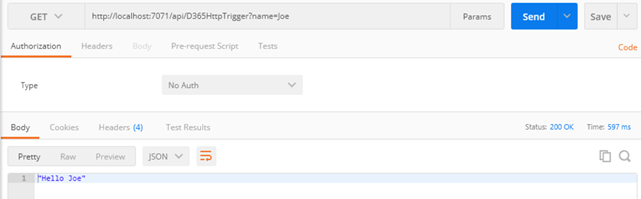
Let us host this function locally so that we can execute this as is using Postman
Execute the below command in VS code to start the host service
func host start –debug vscode
You should see the following message once the function is hosted:

This is the URL where your function is being hosted. You can now execute this function by calling this URL.
Back in your command window in VS Code, you will see the debug info.
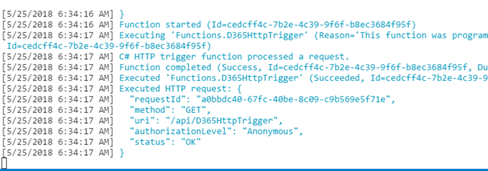
Once you are hosting the function, it also tracks and compiles the changes made to the code in real time and reports errors if any

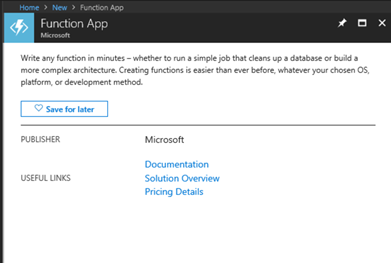
You can now host this function on Azure. Login to Azure portal and create a new Function App.
Next
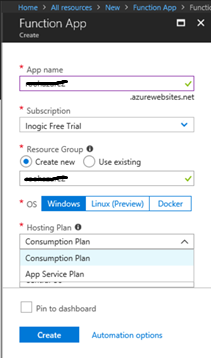
There are 2 plans available Consumption and App Service Plan. Functions hosted in Consumption Plan need to finish execution within 5 minutes, it could further be extended to 10 minutes by changing configuration settings, but any function that would take longer than that to execute should move to App Service Plan.
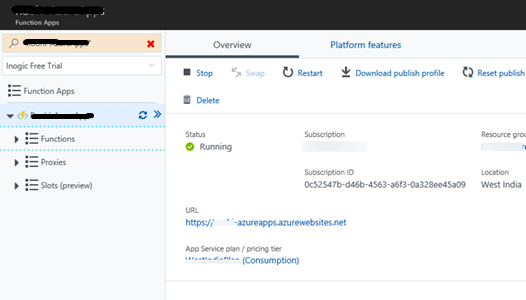
Once your resource has been provisioned, this is where you land.
There are multiple ways to upload your function to Azure
Manually create the function and update the code
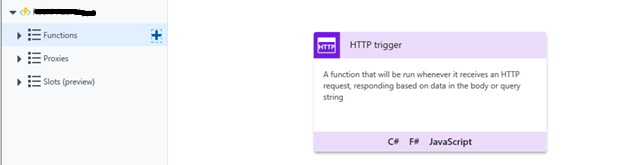
1. Click + button and create a function – Choose HTTP trigger for our example
2. Choose Function Level Authorization
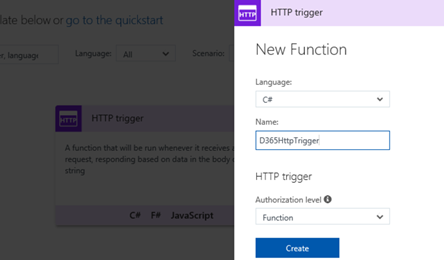
This will require a code to be passed to invoke this function. If the code does not match, it will not execute the function.
3. You get the same scaffolding ready that you had using the command in VS Code.
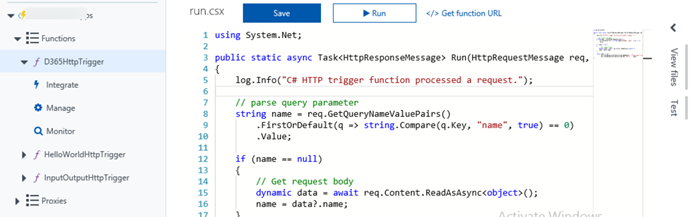
4. Now if you had changed the code in a local environment you could simply copy/paste the code in run.csx and save it.
5. You can also use the View files section to upload files.
VSTS continuous integration
You can also have the files/folders created and uploaded directly. For this, you need to create Deployment Plan using the Deployment Options.

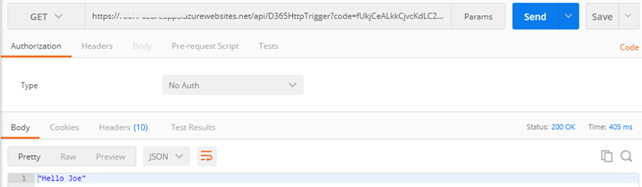
Now let us test this function through Postman.
Click Get Function URL found on the run.csx file to get the URL to execute this function. You will notice the URL comes with the code query string attached to it.
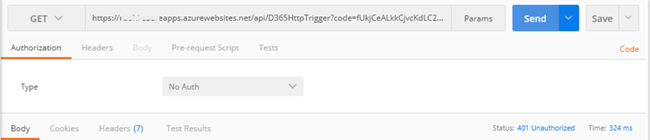
If you provide an incorrect code you get the error status code
With the Azure function hosted, it is now ready to be invoked from D365.
Conclusion:
In this blog, We saw how to create an Azure function and now that we have our Azure function ready and hosted, in our next blog we have look at invoking the function through a workflow.
Marketing4Dynamics – Mailchimp and Dynamics 365 CRM integration to plan effective sales strategies, increase sales and improve ROI
- Sync Audiences, Members and Tags from Mailchimp to CRM
- Sync CRM Marketing List (Contacts/Leads) to Mailchimp
- Sync Campaigns and Member activities from Mailchimp to CRM
- Monitor and analyze Mailchimp campaign statistics through Dashboards in CRM