Introduction:
We had a requirement where we wanted to add a view that will list out all the Work Order Incidents on the Resco Mobile CRM app. We also wanted to add clickable images to this view to allow the user to mark Work Order Incidents as resolved or unresolved through a visual guide.
To mark Work Order Incidents as resolved, we wanted to use:
![]()
and to mark it as unresolved, we wanted to use:
![]()
In this blog, we will guide you through the steps required to achieve this with the Resco Mobile CRM app.
Steps to add clickable images in a view on the Resco Mobile CRM app:
1. First and foremost, we need to add these two images in the Resco Mobile Project. To know how to add an image in the Mobile Project, refer this link.
Note: Make sure that while adding images in the Mobile Project, the name of the image is same as the field value (text value). In this case, we want to utilize the images for the field ‘Incident Resolved’. This field is a two option field and has text value as ‘Yes’ and ‘No’. So we will name the images as ‘Yes’ and ‘No’.
2. Once you have added the required images in the Mobile Project, next step is to create a view.
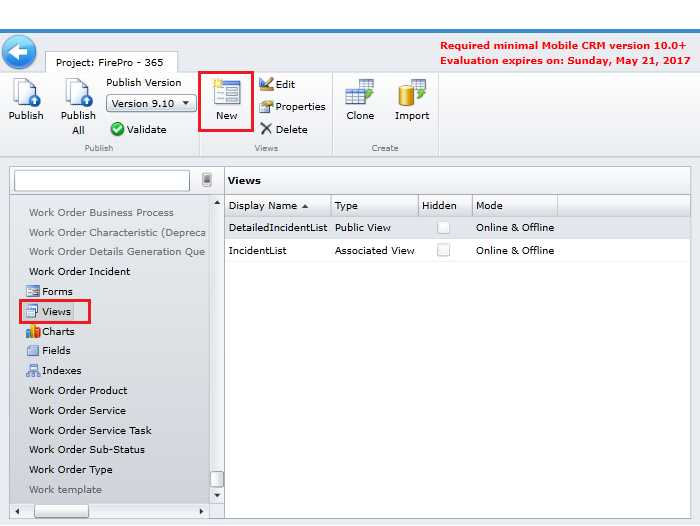
To create a view, go to ‘Work Order Incident’ entity and click on ‘Views’ as shown in the screenshot below;
Once you have added the view, open that view and select the fields that you require.
3. Now the next step is to add new Styles that are needed to show the editable image in the view, to add new Styles please follow the steps mentioned below;
a. Open the newly created View and click on the ‘Edit Styles’ as shown in the screenshot below;

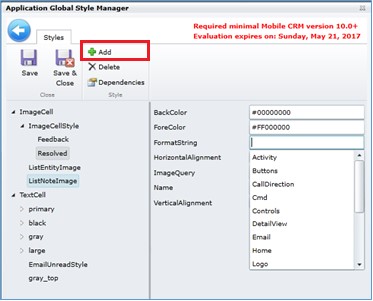
b. Once you click on ‘Edit Styles’, the ‘Application Global Style Manager’ window will open next. Select the ‘ImageCellStyle’ and click on ‘Add’ as shown in the screenshot below;
c. Now add the name of the style, in this case, we have named it as ‘Resolved’. In the ‘FormatString’ field you need to select the Directory to which you have added the image as shown in the screenshot below;
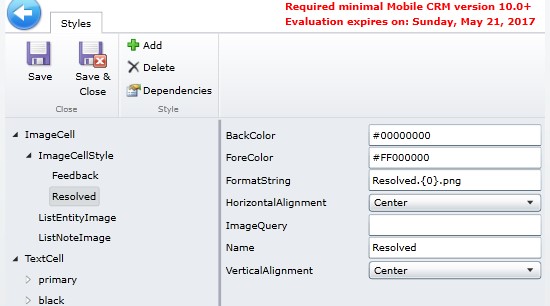
In this case, the ‘FormatString’ is ‘Resolved.{0}.png’.
Here, ‘Resolved’ is the Directory name where the image is stored, ‘{0}’ is the field text value i.e. ‘Yes’ or ‘No’, and ‘.png’ is the image file extension.
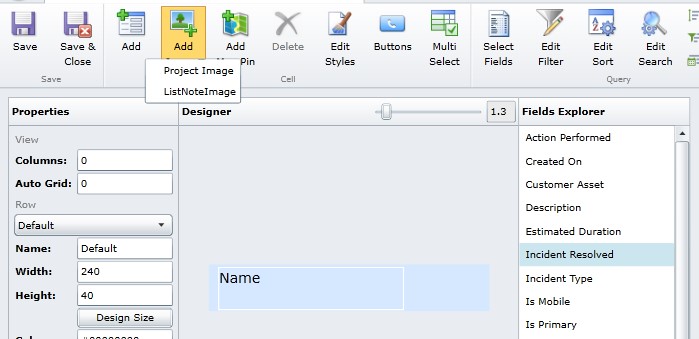
4. After creating ‘Styles’ the next step is to add the image in the view. Click on ‘Add Image’ on the View form. As you can see in the screenshot below, the image control is added in the View. Here you can arrange the position of the image in the View.
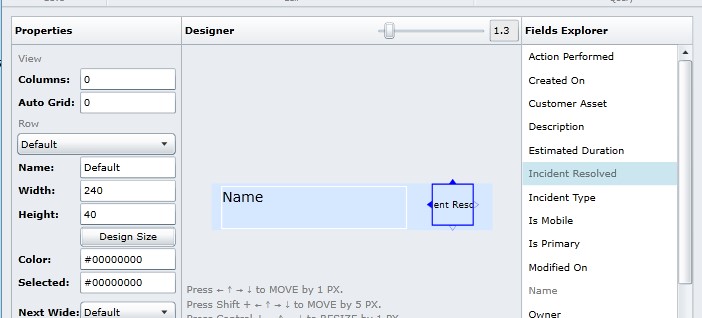
5. Now click on the image control and select the field for which you want to show the image.
6. The final step is to set the property of the image control added in the view. Here, set the ‘Kind’ as ‘Image-Click’ and ‘Style’ as ‘Resolved’ as seen in the screenshot below;

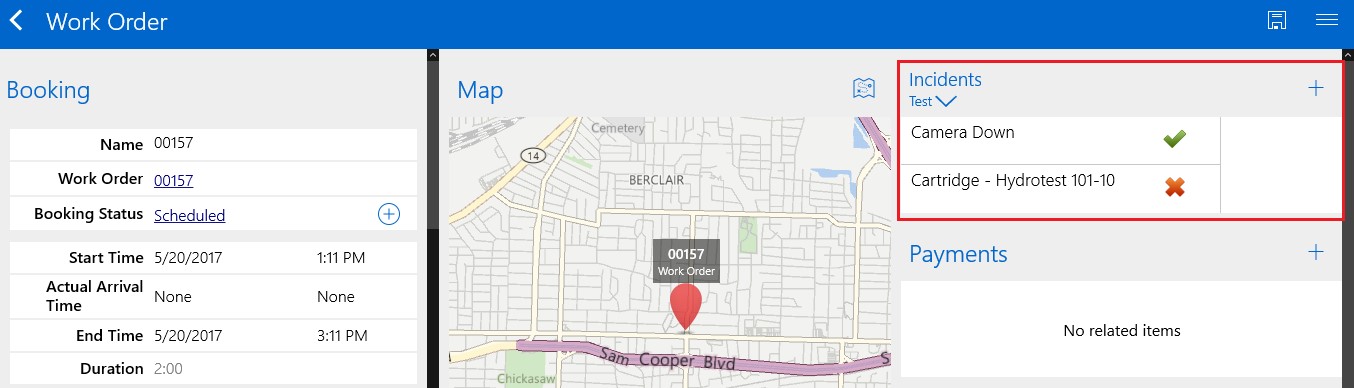
7. Save the changes and publish the project. Once the project is published, open the project on your Mobile. Open the Work Order you can now see the clickable images that we have added in the ‘Incidents’ view instead of ‘Yes’ and ‘No’ as seen in the screenshot below;
Conclusion:
Clickable images in the View on the Resco Mobile CRM app gives the users a pictorial representation of the data and helps improve the end user experience.
