Introduction:
We have often had sync requests projects where we need to write data from CRM to flat files. Our option until now had been to either
- Develop a Windows service, that polls at regular intervals to writes the file
- Develop a Windows app and using the windows task scheduler to schedule to run at regular intervals or specified times.
After exploring SSIS platform, it opens up another option in this direction. We can create SSIS packages, and configure it to run at regular intervals using SQL Jobs.
Here we plan to provide a walkthrough to help other start off with CRM integration using SSIS.
Walkthrough:
Open Visual Studio -> Go to -> File Menu -> New -> Project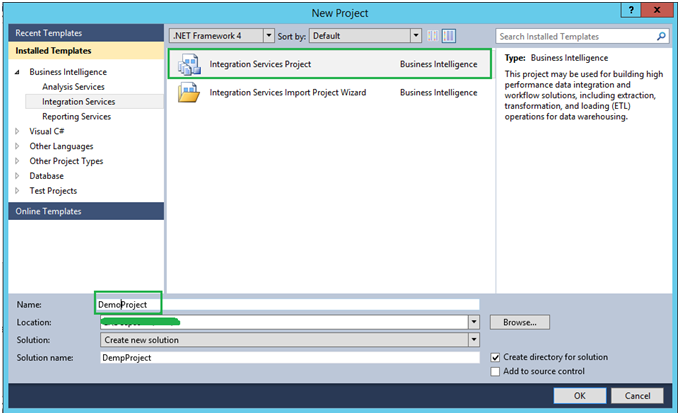
Select Integration Service Project from Business Intelligence tab (Note: You get this tab only when you have BIDS installed) and give a proper name to your project and click Ok.
SSIS project solution will get created with a Package file added. Open the package file and add Data Flow Task from SSIS tools to Control Flow as shown below. Give the Data Flow Task a proper name.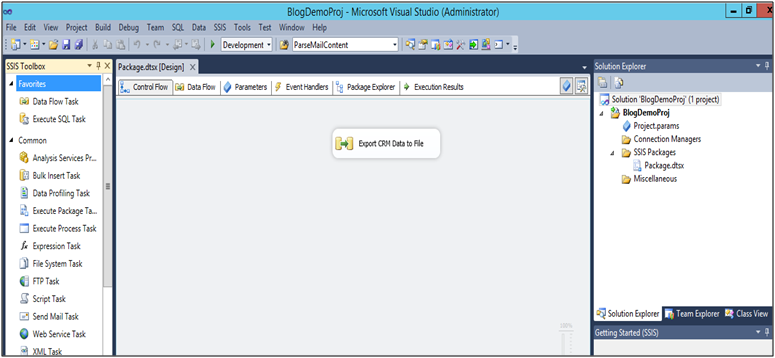
Double click on Data Flow Task (Renamed as Export CRM Data to File) and add Script Component and Flat File Destination components as shown below: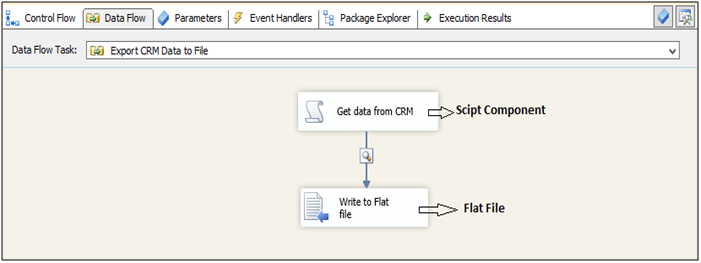
When you drag drop Script Component to Data Flow you will get following popup. Choose “Source” from the options as follows: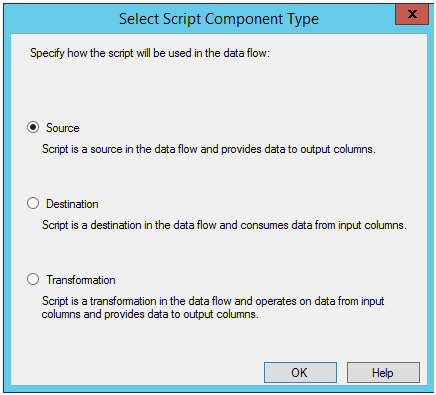
Next to connect to CRM (here we are taking online CRM) we will need to provide connection credentials. For this we will create package level parameters and later pass them as parameters to our Script component. Right click anywhere on Control Flow tab and select variables as shown below: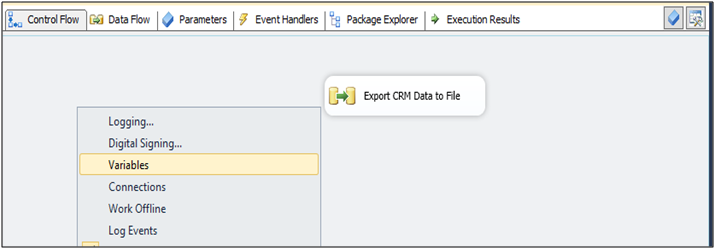
Next create the following variables which will be required for connection: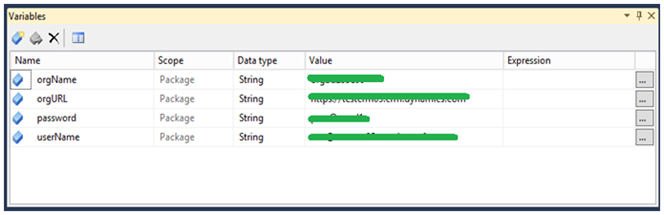
Here you can find that we have defined all the credentials that are necessary for connecting to CRM.
Now comes the major part wherein you will be accessing CRM using CRM SDK dlls. Right click on script component and click Edit as shown below.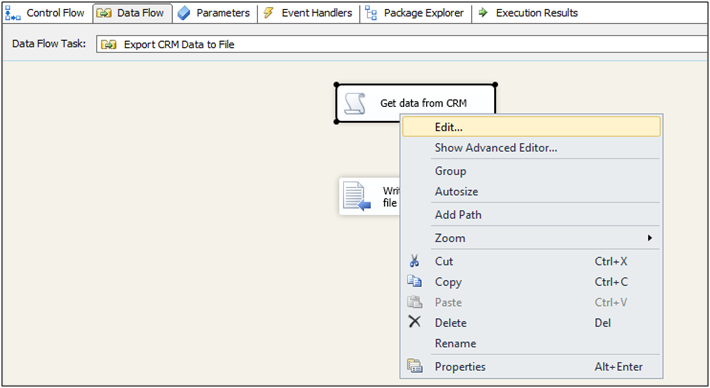
A Script Transformation Editor will open as follows: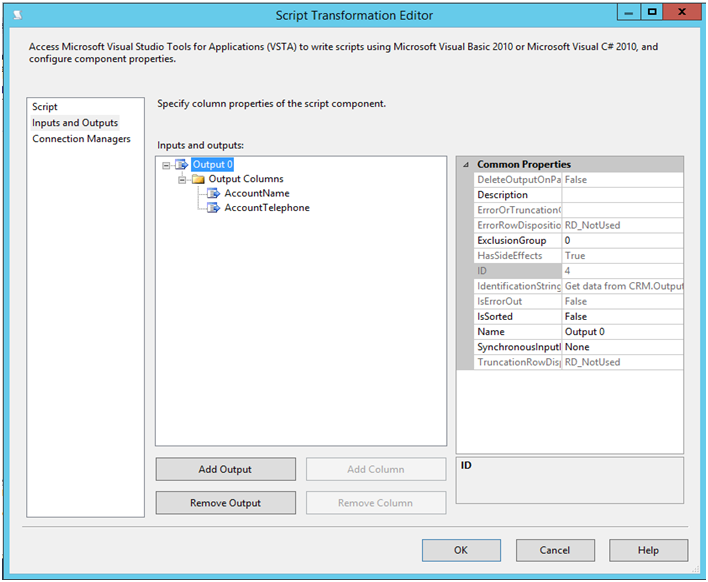
For demo purpose we will read two fields (Account Name and Telephone) from Account Entity records and write it to flat file. As shown above Go to -> Inputs and Outputs tab -> add two columns to the Output Columns viz. “AccountName” and “AccountTelephone” as String data types.
Next navigate to -> Script tab and pass the connection credential variables that we created to the ReadOnly Variables as follows:
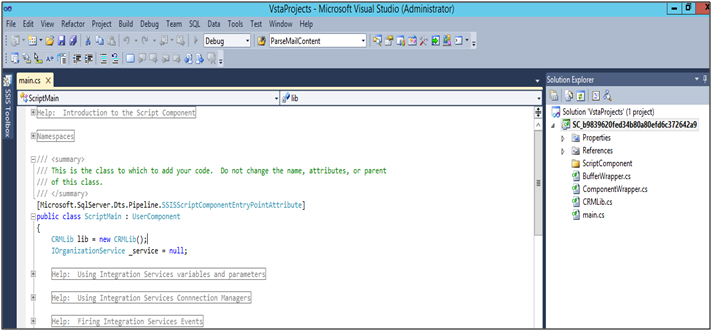
Now click Edit Script and a Visual Studio solution will open as follows: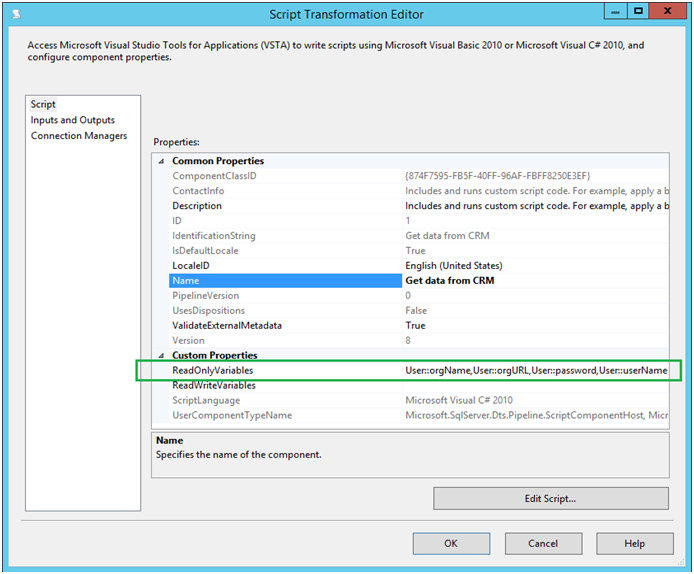
 Now in order to refer CRM SDK dlls in our project we first need to register them in GAC. To do that please follows the following steps:
To register dll in GAC:
- Go to Visual Studio command prompt (Please note that this should be the command prompt of the Visual Studio which you are currently using)
- There type -> gacutil /i “path of the dll along with dll name i.e (.dll)”
- Enter
You will get message -> assembly successfully added to cache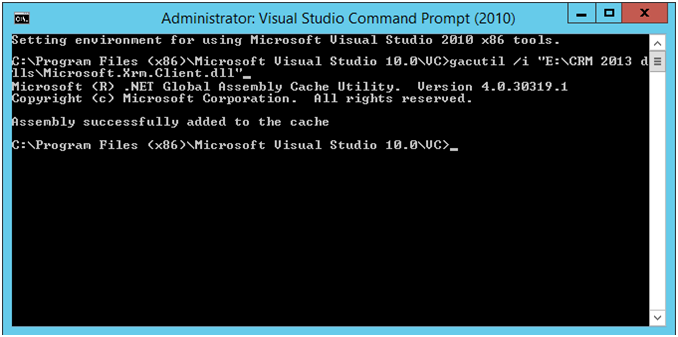
In this way we need to register following dll’s :
- Microsoft.Crm.Sdk.Proxy.dll
- Microsoft.Xrm.Client.dll
- Microsoft.Xrm.Sdk.dll
Please note that all the above dlls which are provided in Microsoft CRM SDK package are built in version 4.0. Hence the project file where we need to add these references should be built in .net framework 4.0 or above. So please check the project built version as follows: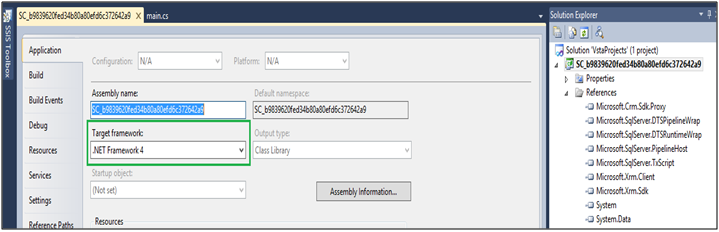
You will need to install .Net Framework Version 4.0 and higher or else you will get build errors related to the version conflict for dll’s and the project won’t build successfully.
Next go to -> Solution explorer and add reference to the CRM dlls once they are registered in GAC as follows: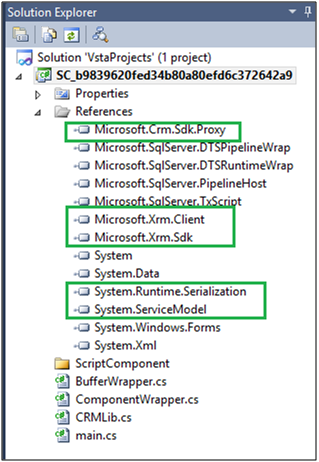
Also you need to add System.Runtime.Serialization dll and System.ServiceModel dll.
Now to connect to CRM you can create a Class library which will have code for CRM connection and pass the connection parameters to it. Also refer all the respective dlls in header Namespace as follows: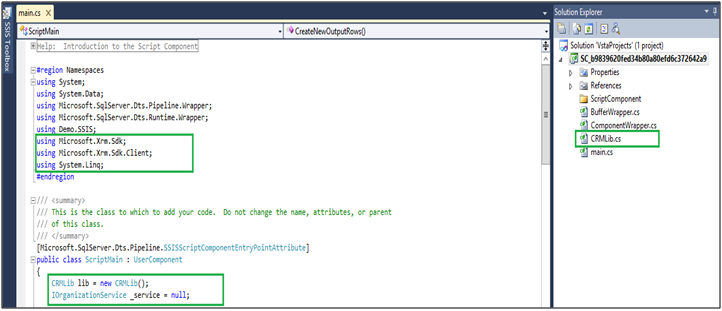
As shown above define the CRM library and IOrganizationService globally so that you can initialize and use them in later events.
Now InPreExecute event Initialize Organization service by passing the connection parameters as follows :
/// <summary>
/// This method is called once, before rows begin to be processed in the data flow.
///
/// You can remove this method if you don’t need to do anything here.
/// </summary>
public override void PreExecute()
{
base.PreExecute();
_service = lib.InitializeOrgService(Variables.orgURL, Variables.orgName, Variables.userName, Variables.password);
}
Next on CreateNewOutputRows event you can query CRM using the organization service as follows:
public override void CreateNewOutputRows()
{
/*
Add rows by calling the AddRow method on the member variable named “<Output Name>Buffer”.
For example, call MyOutputBuffer.AddRow() if your output was named “MyOutput”.
*/
using (OrganizationServiceContext svc = new OrganizationServiceContext(_service))
{
var accountEntities = from acc in svc.CreateQuery(“account”)
select acc;
var accountList = accountEntities.ToList();
if (accountList != null && accountList.Count > 0)
{
for (int i = 0; i < accountList.Count(); i++)
{
if (accountList[i].Contains(“name”) && accountList[i].Contains(“telephone1”))
{
Output0Buffer.AddRow();
string accountName = Convert.ToString(accountList[i][“name”]);
string accountTelephone = Convert.ToString(accountList[i][“telephone1”]);
Output0Buffer.AccountName = accountName;
Output0Buffer.AccountTelephone = accountTelephone;
}
}
}
}
}
In above code you can find that using LINQ we fetched Account entity records. Then we loop through each records and get the “name” and “telephone1” field and set it to the Output0Buffer variables viz. “AccountName” and “AccountTelephone” as we defined in the output variables in script.
When you are done with all this coding, save and build the solution and close the solution.
Now you are ready to execute your package. Run the package and you will get all the Account Entity related records as follows: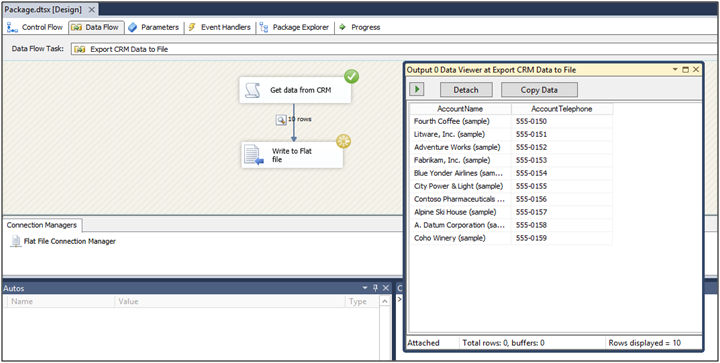
The output file will look like this :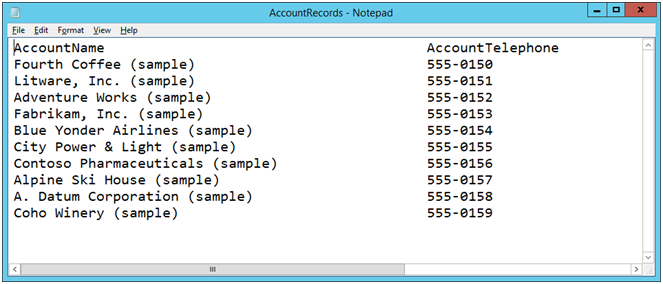
In this way using CRM dlls you can query data and import it and divert it to the destination as per your requirement.
Conclusion:
Though you can go ahead and develop SSIS packages using CRM DLL, it might make sense to check out the Dynamics CRM SSIS tools available from Kingsway Soft. This was a simple read operation that we were working on, but for complex write operations to CRM, the prepackaged CRM Adapter for SSIS from Kingsway would always be preferred.
Look Beyond “CRM” in your Dynamics CRM with QuickBooks Integration. For more details get in touch with us on crm@inogic.com.
Update: If you are working on a machine that does not have VS installed and therefore you do not have access to VS Command prompt. You can follow the below steps
1. Search for “gacutil” in C:
2. Once you locate the “gacutil”, from the command prompt, change directory to the path where gacutil is stored.
3. Now execute the following command from the command prompt
gacutil /i pathtoassemblyFileName.dll /f
e.g. gacutil /i “C:\Users\Administrator\Desktop\SDK365\Microsoft.Xrm.Sdk.dll” /f
Hi,
May I ask you regarding the CRMLib class. Should I expect the class to be auto generated soon as I add the required CRM References or should I create and code it? If the second approach occurs could you help me out with a better insight?
Thanks in advance,
CRM Lib class will not be auto generated and you need to create and code it and it basically contains code for connection to CRM with Organization Service Context and you can refer this link to work with the same: https://docs.microsoft.com/en-us/dynamics365/customer-engagement/developer/org-service/sample-use-organization-service-context
Hope this helps!